Make sure you’ve completed the Quickstart setup before starting.
Step 1: Start Drift
Open your terminal (or the integrated terminal in VS Code or Cursor) and launch Drift:drift> prompt.
Step 2: Create the Robot
Tell Drift what robot you want:- Create a ROS2 workspace
- Generate the URDF for a manipulator arm with a gripper
- Set up the necessary ROS2 packages
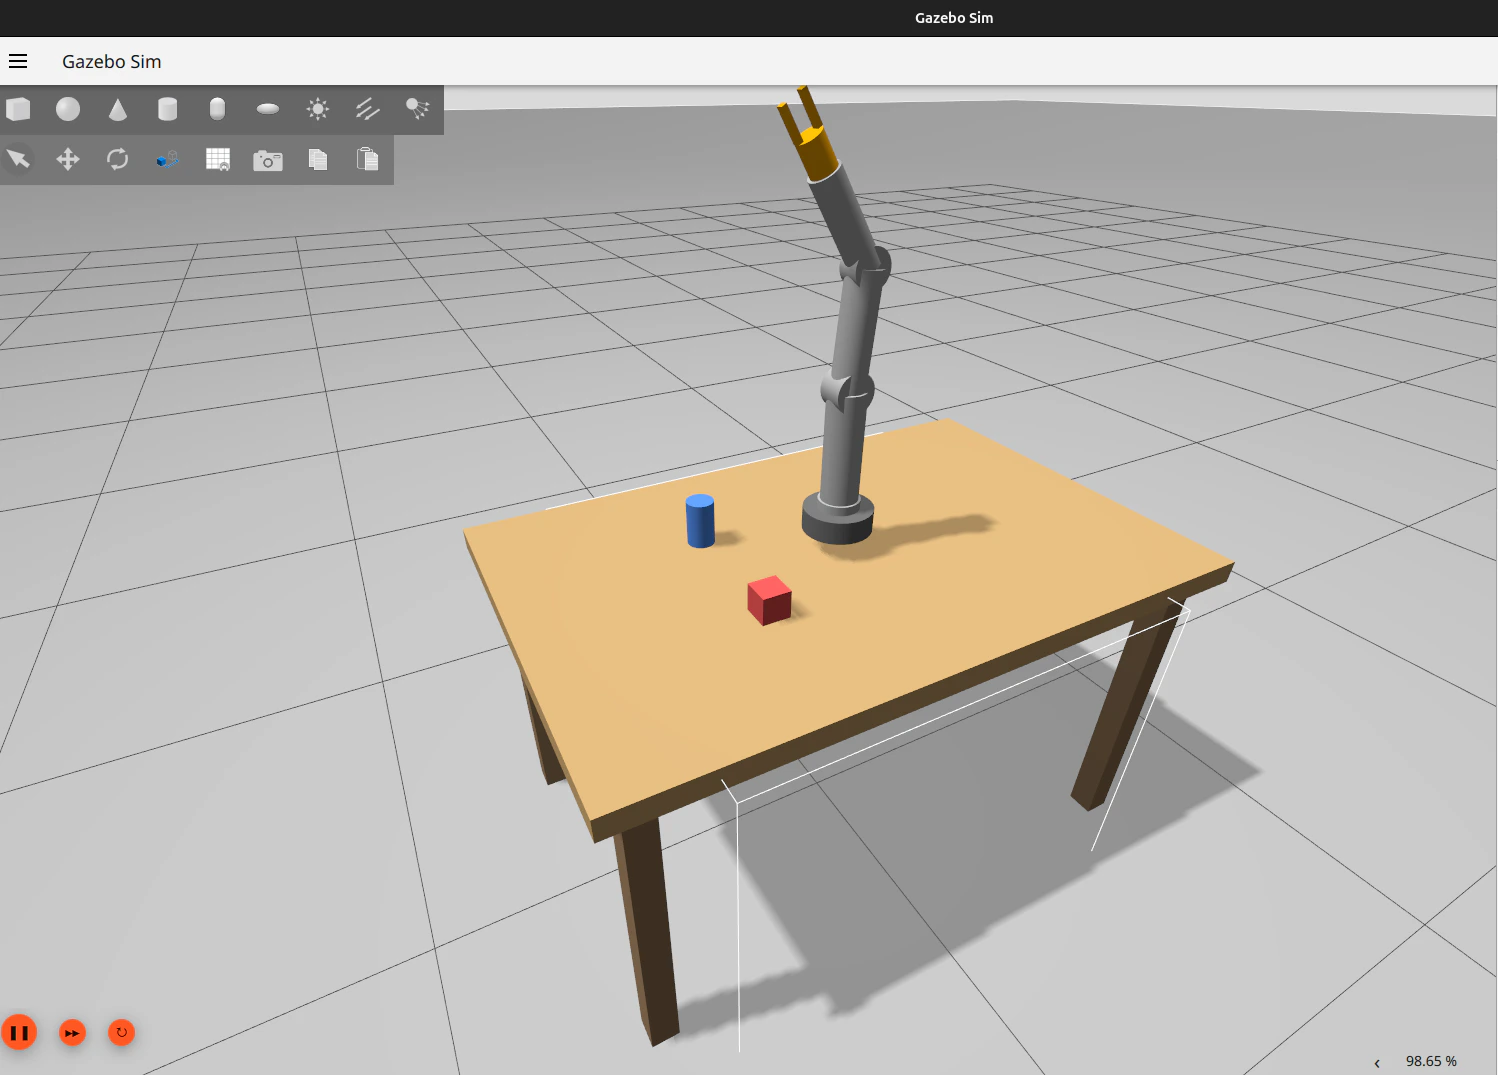
- Create a Gazebo world with a table, pick objects, and target markers
- Generate launch files
- Build the entire workspace
Step 3: Launch the Simulation
Once the build completes, launch everything:- A ground plane as the floor surface
- A table as the workspace
- Pick objects (boxes or cylinders) on the table
- A target marker showing the goal position
- Your robot arm ready to operate
Step 4: Explore the Environment
With the simulation running, you can inspect what’s happening:/ps command shows all running processes — your ROS2 nodes, the Gazebo instance, and any controllers.
Step 5: Add a Sensor
Let’s add a camera to the robot so it can see what it’s picking up:- Update the URDF with the camera link and joint
- Configure the Gazebo camera plugin
- Rebuild the workspace
- Relaunch the simulation
Step 6: Debug an Issue
If something isn’t working — say the camera isn’t publishing images — ask Drift:Step 7: Iterate
This is where Drift shines. Keep building on what you have:What You Built
By the end of this guide, you’ve created:- A complete ROS2 workspace with packages
- A robot arm described in URDF with sensors
- A Gazebo world with objects and a table
- Launch files that tie everything together
- A running simulation you can iterate on
Want the MuJoCo path instead?
This guide takes the Gazebo + ROS2 route. If you want a fast, headless-friendly simulator that doesn’t need ROS2 in the loop, see Building a MuJoCo Scene — same idea, MJCF instead of URDF/SDF.Next Steps
Manipulator in RViz
Simulate a 3-joint robot arm and visualize it in RViz
Building a MuJoCo Scene
The MuJoCo-first path
Project Context
Give Drift your project’s facts once, get them used on every prompt
Commands Reference
Full list of Drift CLI commands and slash commands