> ## Documentation Index
> Fetch the complete documentation index at: https://docs.godrift.ai/llms.txt
> Use this file to discover all available pages before exploring further.
# Your First Simulation
> A complete walkthrough to build a pick-and-place robot simulation and launch on Gazebo from scratch with Drift
In this guide, you'll build a complete pick-and-place robot simulation from scratch using Drift. By the end, you'll have a robot arm on a table picking up objects in Gazebo Sim.
Make sure you've completed the [Quickstart](/getting-started/quickstart) setup before starting.
## Step 1: Start Drift
Open your terminal (or the integrated terminal in VS Code or Cursor) and launch Drift:
```bash theme={null}
drift
```
You'll see the Drift welcome screen with the interactive `drift>` prompt.
## Step 2: Create the Robot
Tell Drift what robot you want:
```drift theme={null}
create a pick-and-place robot simulation
```
Drift will plan and execute the following:
* Create a ROS2 workspace
* Generate the URDF for a manipulator arm with a gripper
* Set up the necessary ROS2 packages
* Create a Gazebo world with a table, pick objects, and target markers
* Generate launch files
* Build the entire workspace
Watch the output as Drift works through each step. If any step fails (e.g., a missing dependency), the Agent will attempt to fix it automatically.
## Step 3: Launch the Simulation
Once the build completes, launch everything:
```drift theme={null}
launch my robot in Gazebo
```
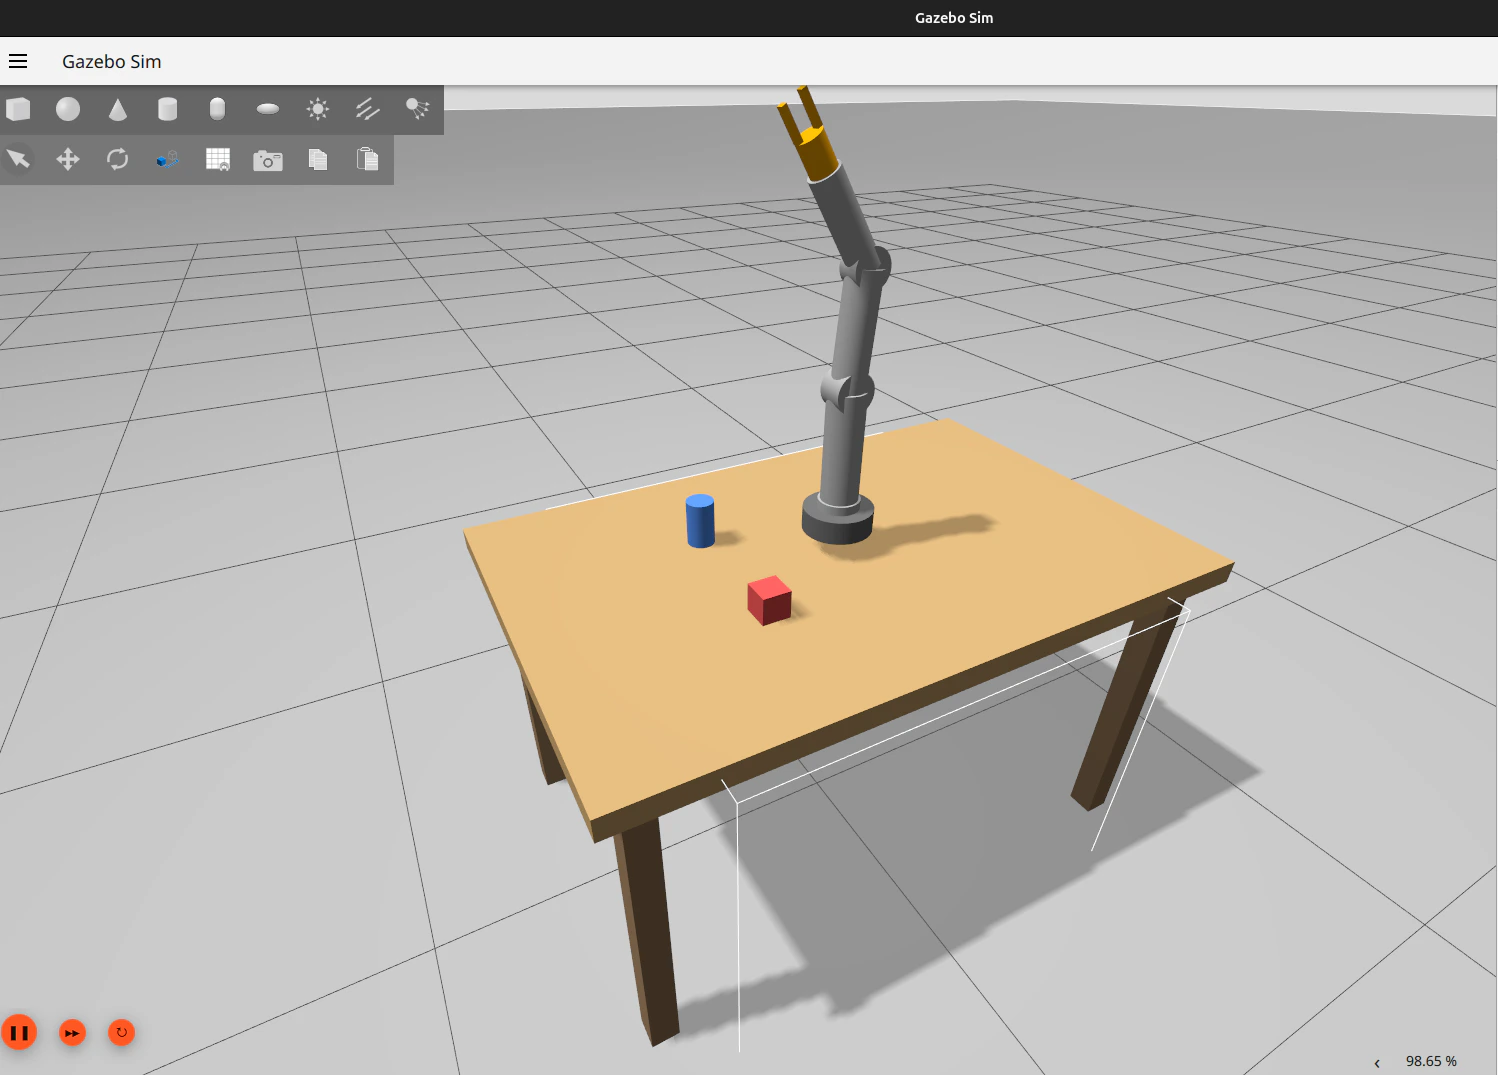
Gazebo Sim will open showing your simulation environment. You should see:
* A **ground plane** as the floor surface
* A **table** as the workspace
* **Pick objects** (boxes or cylinders) on the table
* A **target marker** showing the goal position
* Your **robot arm** ready to operate
 ## Step 4: Explore the Environment
With the simulation running, you can inspect what's happening:
```drift theme={null}
what topics are being published?
/ps
```
The `/ps` command shows all running processes — your ROS2 nodes, the Gazebo instance, and any controllers.
## Step 5: Add a Sensor
Let's add a camera to the robot so it can see what it's picking up:
```drift theme={null}
add a camera sensor to my robot and rebuild
```
Drift will:
1. Update the URDF with the camera link and joint
2. Configure the Gazebo camera plugin
3. Rebuild the workspace
4. Relaunch the simulation
## Step 6: Debug an Issue
If something isn't working — say the camera isn't publishing images — ask Drift:
```drift theme={null}
why isn't my camera publishing images?
```
The Agent will check the ROS2 topic list, inspect the sensor configuration, and give you a diagnosis with a suggested fix.
## Step 7: Iterate
This is where Drift shines. Keep building on what you have:
```drift theme={null}
add a lidar sensor to the base
add more objects to the table
change the gripper to a suction cup
increase the arm reach
```
Each change triggers only the necessary rebuilds. You don't have to restart from scratch.
## What You Built
By the end of this guide, you've created:
* A complete ROS2 workspace with packages
* A robot arm described in URDF with sensors
* A Gazebo world with objects and a table
* Launch files that tie everything together
* A running simulation you can iterate on
All through natural language prompts — no manual URDF editing, no hand-written launch files, no Gazebo XML.
## Want the MuJoCo path instead?
This guide takes the Gazebo + ROS2 route. If you want a fast, headless-friendly simulator that doesn't need ROS2 in the loop, see [Building a MuJoCo Scene](/guides/mujoco-scene) — same idea, MJCF instead of URDF/SDF.
## Next Steps
Simulate a 3-joint robot arm and visualize it in RViz
The MuJoCo-first path
Give Drift your project's facts once, get them used on every prompt
Full list of Drift CLI commands and slash commands
## Step 4: Explore the Environment
With the simulation running, you can inspect what's happening:
```drift theme={null}
what topics are being published?
/ps
```
The `/ps` command shows all running processes — your ROS2 nodes, the Gazebo instance, and any controllers.
## Step 5: Add a Sensor
Let's add a camera to the robot so it can see what it's picking up:
```drift theme={null}
add a camera sensor to my robot and rebuild
```
Drift will:
1. Update the URDF with the camera link and joint
2. Configure the Gazebo camera plugin
3. Rebuild the workspace
4. Relaunch the simulation
## Step 6: Debug an Issue
If something isn't working — say the camera isn't publishing images — ask Drift:
```drift theme={null}
why isn't my camera publishing images?
```
The Agent will check the ROS2 topic list, inspect the sensor configuration, and give you a diagnosis with a suggested fix.
## Step 7: Iterate
This is where Drift shines. Keep building on what you have:
```drift theme={null}
add a lidar sensor to the base
add more objects to the table
change the gripper to a suction cup
increase the arm reach
```
Each change triggers only the necessary rebuilds. You don't have to restart from scratch.
## What You Built
By the end of this guide, you've created:
* A complete ROS2 workspace with packages
* A robot arm described in URDF with sensors
* A Gazebo world with objects and a table
* Launch files that tie everything together
* A running simulation you can iterate on
All through natural language prompts — no manual URDF editing, no hand-written launch files, no Gazebo XML.
## Want the MuJoCo path instead?
This guide takes the Gazebo + ROS2 route. If you want a fast, headless-friendly simulator that doesn't need ROS2 in the loop, see [Building a MuJoCo Scene](/guides/mujoco-scene) — same idea, MJCF instead of URDF/SDF.
## Next Steps
Simulate a 3-joint robot arm and visualize it in RViz
The MuJoCo-first path
Give Drift your project's facts once, get them used on every prompt
Full list of Drift CLI commands and slash commands